To upload your website, please follow the steps below
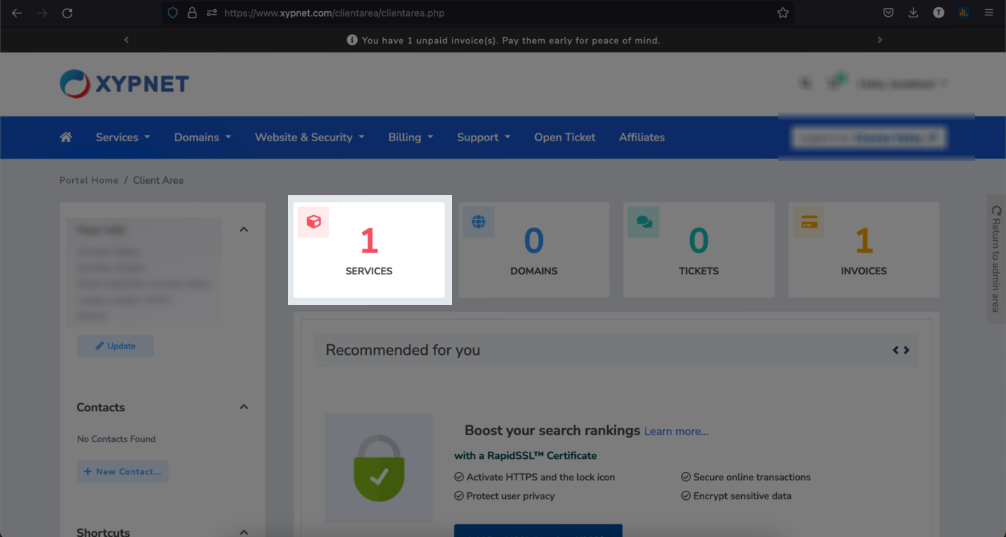
- Login to the client are at https://www.xypnet.com/clientarea/
- On the dashboard, click on Services to go to My Services page
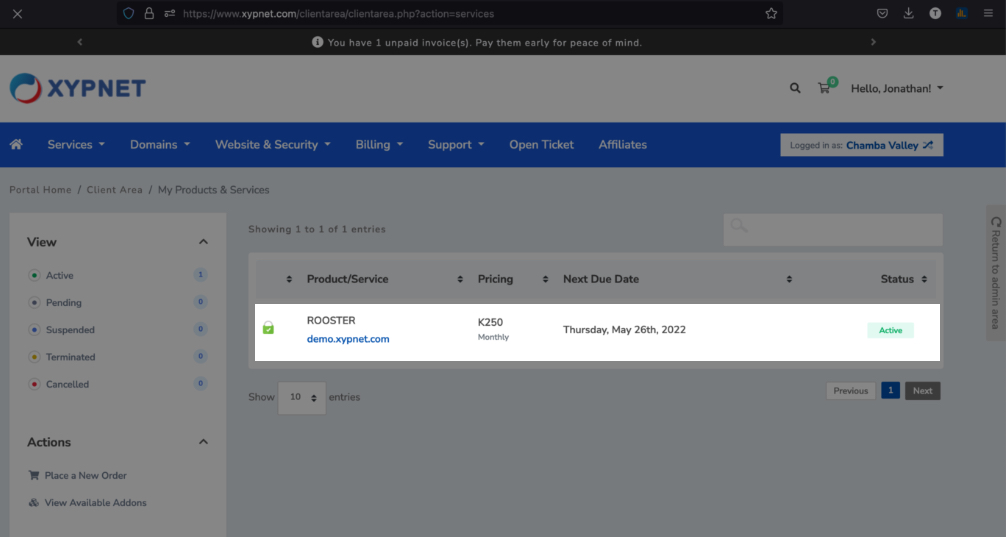
- On the services page, click on the service/domain (Click on the Active button don't click the domain link as it will go to the website)
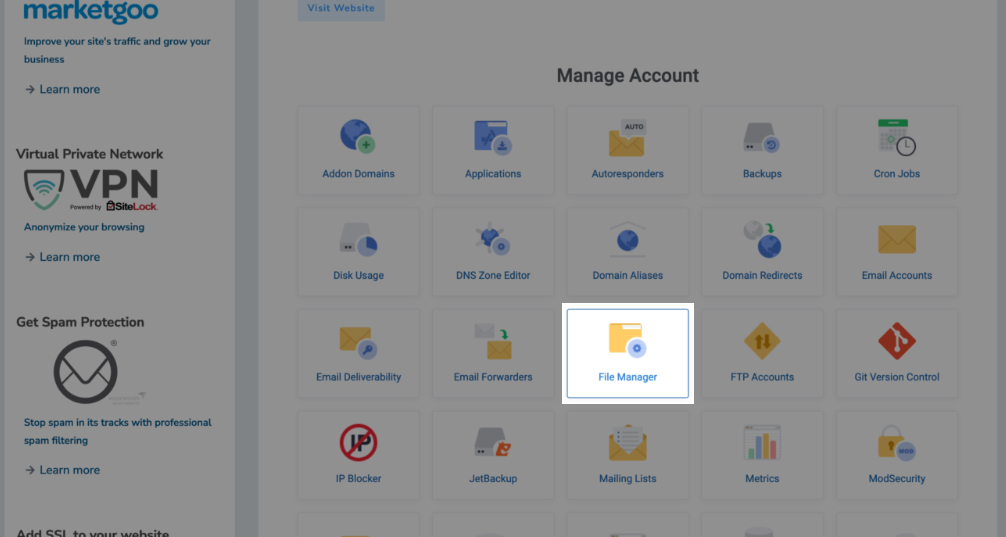
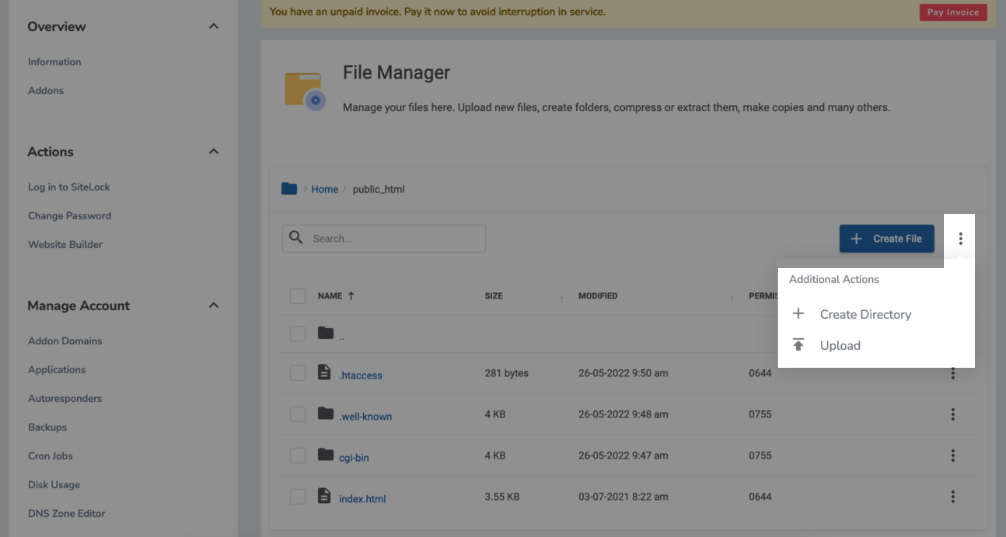
- On the service details page, scroll down to the bottom (look for Manage Account), and click on File Manager
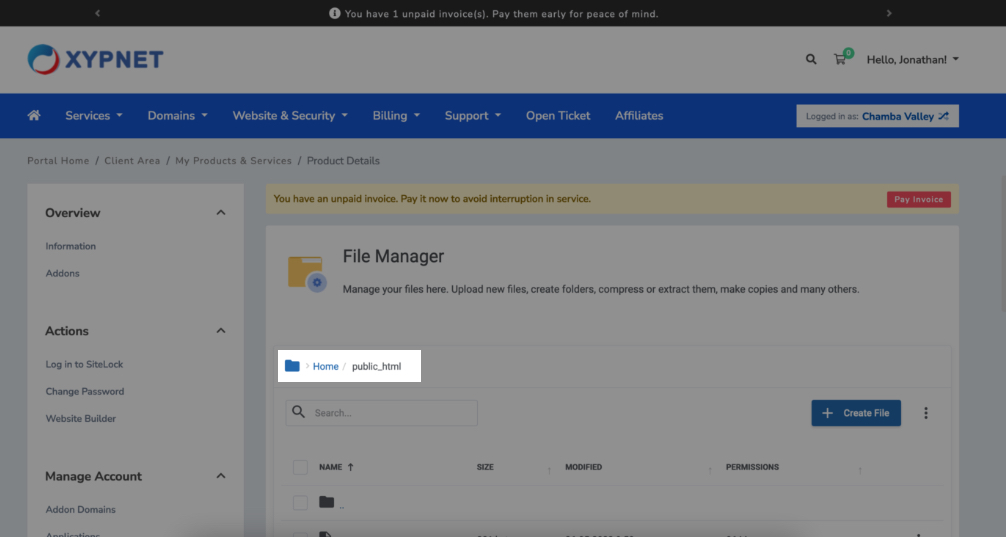
- Make sure you are in folder (Home / public_html), if you are in a different folder, navigate to the public_html folder
- In the public_html folder, click on "more actions" icon, then click upload (found on the right).
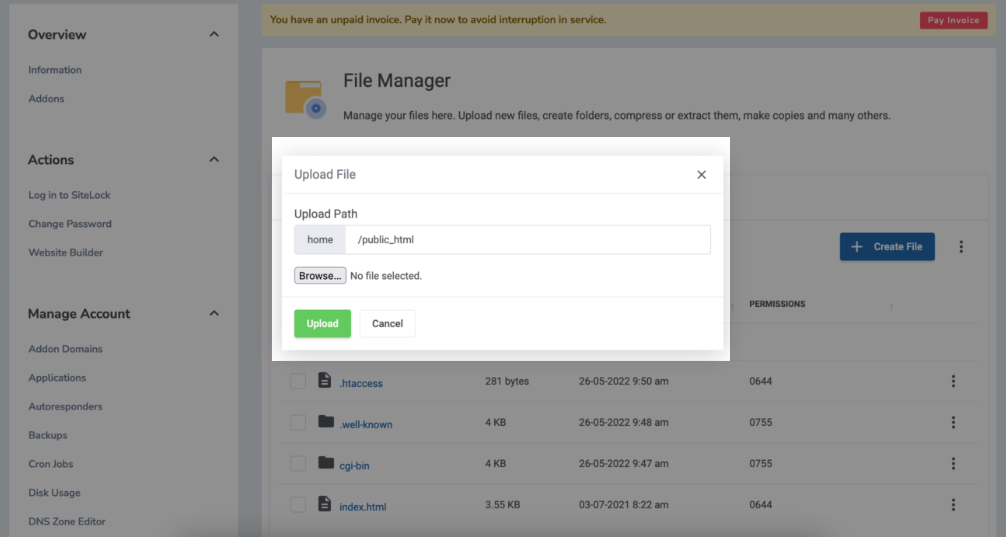
- Making sure the upload directory is public_html, click and browse and select your website files. You can not upload a folder, you will have to zip it then unzip after the upload
- Your website should now be accessible on the internet.
Common mistakes
- Uploading your files in a different directory instead of public_html
- If you still see the default XYPNET page, make sure to delete the index.html page which you will find by default in public_html
- Putting the files in another folder inside the public_html. Your website root files should be in the root of public_html
- Not having an index files. A website or web app needs to have an index file like index.php, index.html or have the file structure configured in special cases.
